Building raised beds for the vegetable garden
December 7th, 2008
 The subtitle to this post should be “Haste makes waste.”
But before I tell you my woeful tale of rushing a gardening project and living to regret it, I will tip you off to a wonderful product that helps non-carpenter types like me build raised beds for backyard vegetable gardening.
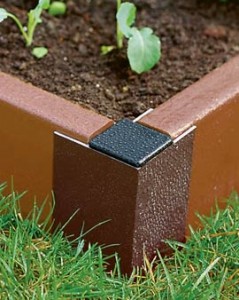
Gardener’s Supply has designed and fabricated a very cool piece of hardware – a corner bracket – that allows you to build a raised bed rather simply, with sections of lumber. Having previously built wobbly raised beds with L-shaped brackets screwed inside two 2-by-10s at a 90-degree angle, I think this Gardener’s Supply solution is far superior (see corner bracket, left).
All you need are four powder-coated, aluminum corner brackets. Slip the boards into the fitted sections of each bracket and secure them with Philips screws inserted in the pre-drilled holes.
There are also side brackets that allow you to extend the raised bed from 4-feet to 8-feet long. And not to sound too Xenophobic, but – hurrah! – these brackets are made in Vermont by Gardener’s Supply. It really is nice to know that something is still manufactured in the U.S. of A. these days.
So, to create one 4-by-8 foot raised bed, you need the following:
- 4 pieces of 2-by-10 lumber measuring 8 feet long
- 3 pieces of 2-by-10 lumber measuring 4 feet long
- 4 corner brackets from Gardener’s Supply
- 2 side brackets from Gardener’s Supply
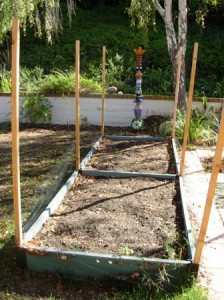 After going first to OSH (Orchard Supply) and Home Depot, two big-box home centers in my neck of the woods, and not finding what I needed, I ventured over to a local lumber yard – Stock Building Supply in Simi Valley. They sold me primed Western spruce boards (also called “fascia” boards). Since I planned on painting my raised beds, this saved me an extra “prep” step. I spent $77 for the lumber to build one bed.
As for the brackets from Gardener’s Supply, I spent $26.95 for 1 set of 10-inch in-line connectors (the side brackets) and $39.90 for four 10-inch corner brackets. The total for lumber and hardware to build one 4-by-8 foot raised bed is: $143.85. This is not including the planting soil.
I’m sure there is a cheaper way to build a raised bed, but this was the best I could do based upon my research. First, I ordered the brackets and purchased the lumber. Then, working in my garage, I painted the edges and outer side of each board. I used leftover turquoise paint from the accent wall in my dining room. (At right – a finished box w/two 4-by-8 foot sections).
 After the boards dried, I arranged the beds in my back yard, and screwed them together with the Philips screw driver. My task went swiftly, thanks to an electric drill and extension cord. If I hadn’t drilled the holes for attaching bracket to wood, it would have been difficult to screw the pieces together and I would probably have ended up with carpel tunnel wrist injury!
When the beds were completed, I painted the “inside” of each box – extending the turquoise color more than halfway past the anticipated soil level. And then came the “filling” endeavor.
I researched local soil sources and ended up ordering organic planting mix from Agromin in Camarillo. They delivered several yards of soil mix to my driveway (which, I’m sure, my neighbors felt was a blemish on our pure little cul-de-sac!) Thankfully, I was able to transport the soil from driveway to backyard beds with the wheelbarrow over the course of several weeks. My spouse, Bruce, finally moved all the soil to the backyard, staging it for me in a nice pile.
I enjoyed figuring out how to build these planting beds. Once two 4-by-8 foot beds were complete, it was time to fill them with the planting soil. This is where the “lesson” of haste versus waste begins.
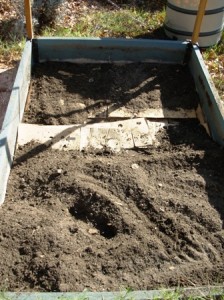 The boxes were built over existing turf. I decided to layer flattened cardboard boxes in the bottom of each planting bed to suppress/kill the grass. Over each cardboard “base,” I planned to dump a 10-inch-deep pile of organic planting soil. Everything went fine for Bed Number One. I had plenty of cardboard left over from our move to California. Lots of nice, big boxes, so I could even double-up on the layering.
When I got to Bed Number Two, I ran out of my source of cardboard. But, darn it, I wanted to plant that day, so I had to finish it up! Instead of doing something clever, like running over to the grocery store or Costco to see if they had any leftover cardboard boxes, I convinced myself that the double-layered butcher paper would suffice.
I had reams of the stuff left over in the garage, since the moving company used it to wrap all our framed prints. It was nice and “thick,” well, thick for butcher paper, but not as thick as cardboard! But I was in a HURRY, and that was my fatal mistake.
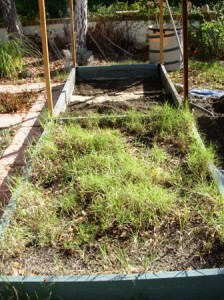
The photos above reveal the error of my ways. I rushed the second raised bed; layered the base with the double butcher paper; piled on the soil and then went ahead and planted my summer annuals. By the end of summer, the beds were crowded out with grass – grass that had come up through the too-quickly-decomposed butcher paper. In the adjacent bed – the bed with a cardboard base – there was no errant grass.
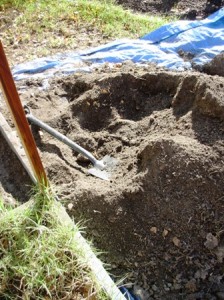 Fast-forward to November and guess what we did over Thanksgiving weekend? After staring at that crappy, useless, grass-filled raised bed for three months, I finally had to deal with it. And deal with it we did. The right way this time.
I got a blue tarp, laid it next to the bed and started digging up the soil. In the process, I had a lot of grass – and grass roots, the annoying runner type – to separate from the soil. Once both 4-by-8 foot beds were “emptied” out, I STARTED OVER. With plentiful sources of (newly acquired) cardboard, we layered the thick material in the bottom of each raised bed. Then we started re-filling the beds.
As of today, the two beds are weed-free and ready to plant. Ugh. What a hassle!
Lessons learned, right? Take the time – THE FIRST TIME – to do it right. In doing so, I will save myself the headache of having to re-do it later!
It’s time to start getting my winter veggie seeds planted. Oh, of course there is one final chapter to this tale. Our neighborhood is home to rabbits. So I have to figure out a fencing system to keep Peter and his friends out of my lettuce greens and herbs. Stay tuned. Maybe that’s next weekend’s project.


December 8th, 2008 at 8:18 pm
Boy, have I had these experiences! I sympathize. I have used those corner brackets for raised beds and been very pleased with them. I like your aqua paint — a cool touch. One good thing — we’ve found that after Thanksgiving, or even the afternoon of the holiday itself, is an excellent time to do outdoor lifting, digging, and raking — all that physical activity really feels good after the usual big meal. Something along those lines has become a Thanksgiving tradition for us — and if you have extended family or out-of-town guests (who have some jeans and sloppy shirts with them), it’s a breeze.